This article shows you how to configure the Exposer module for a simple grid display of your articles. We will go through the necessary parameters step by step and partly go into options.
This tutorial assumes some experience in using Joomla! If you have problems with some steps consult the official Joomla! documentation at https://docs.joomla.org
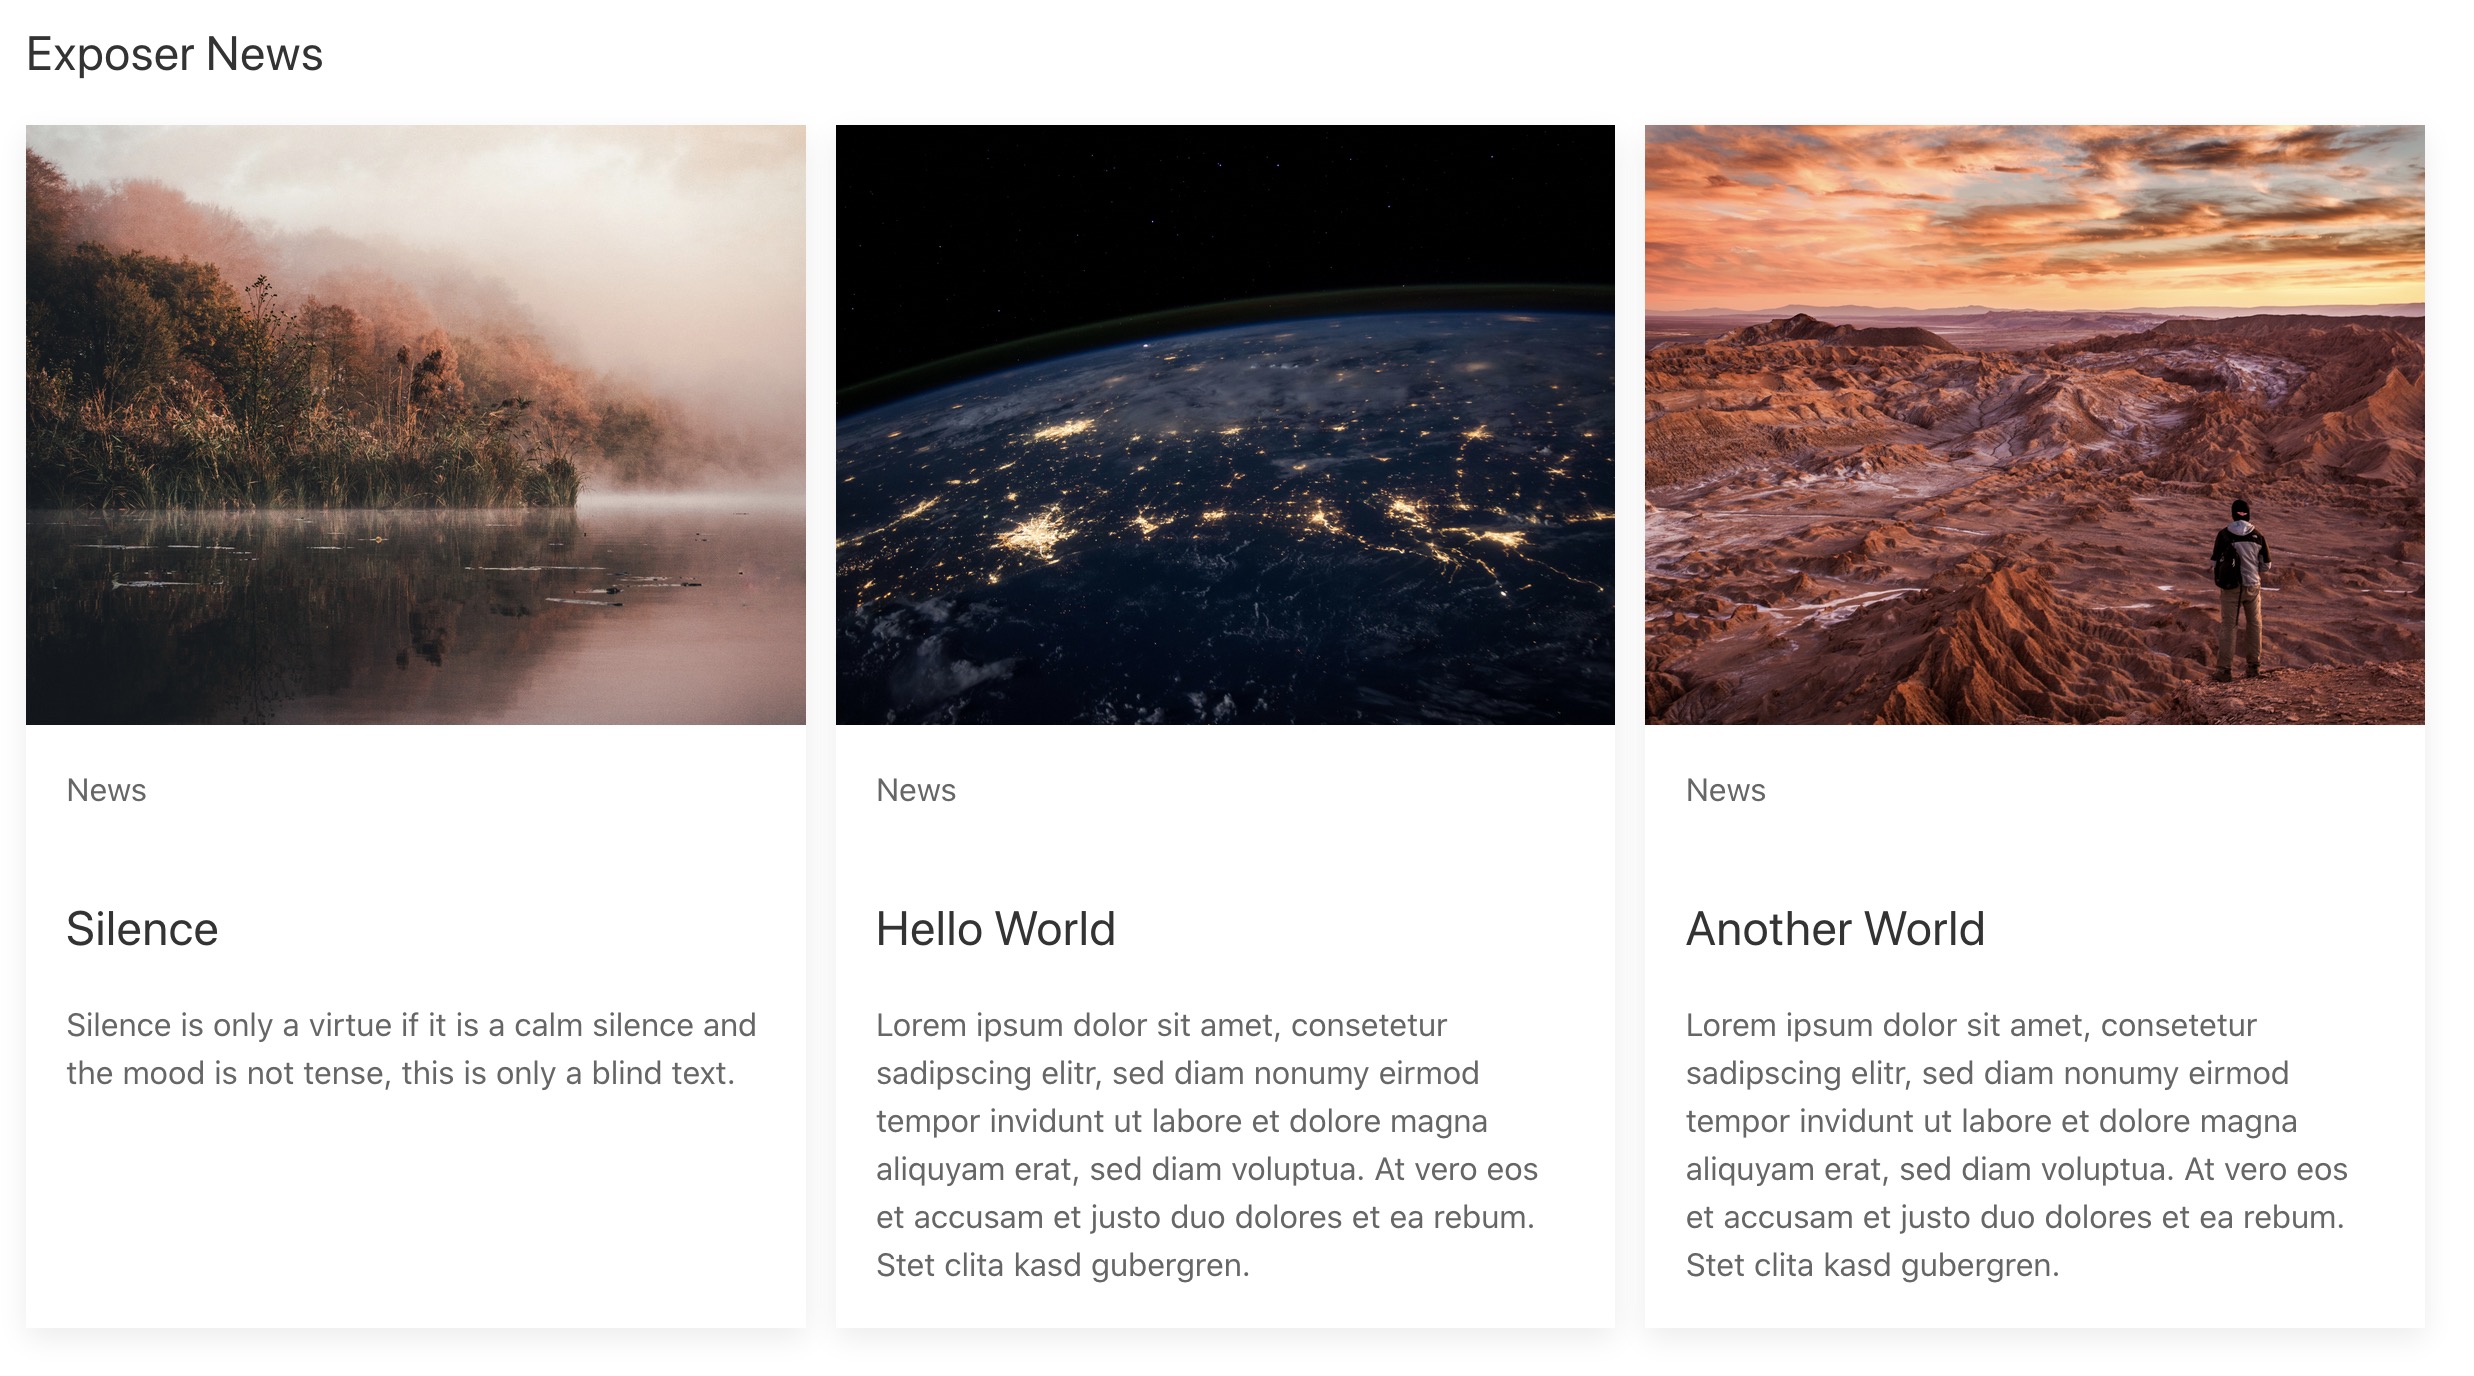
In this article I would like to show you how you can realize a grid like the one shown below in a few minutes:
Preparation
Prepare articles & categories
In the first step we create a category and name it News. It does not matter if it is a main category or a subcategory.
Next we create our first article and give it the name Hello World and assign it to the category News.
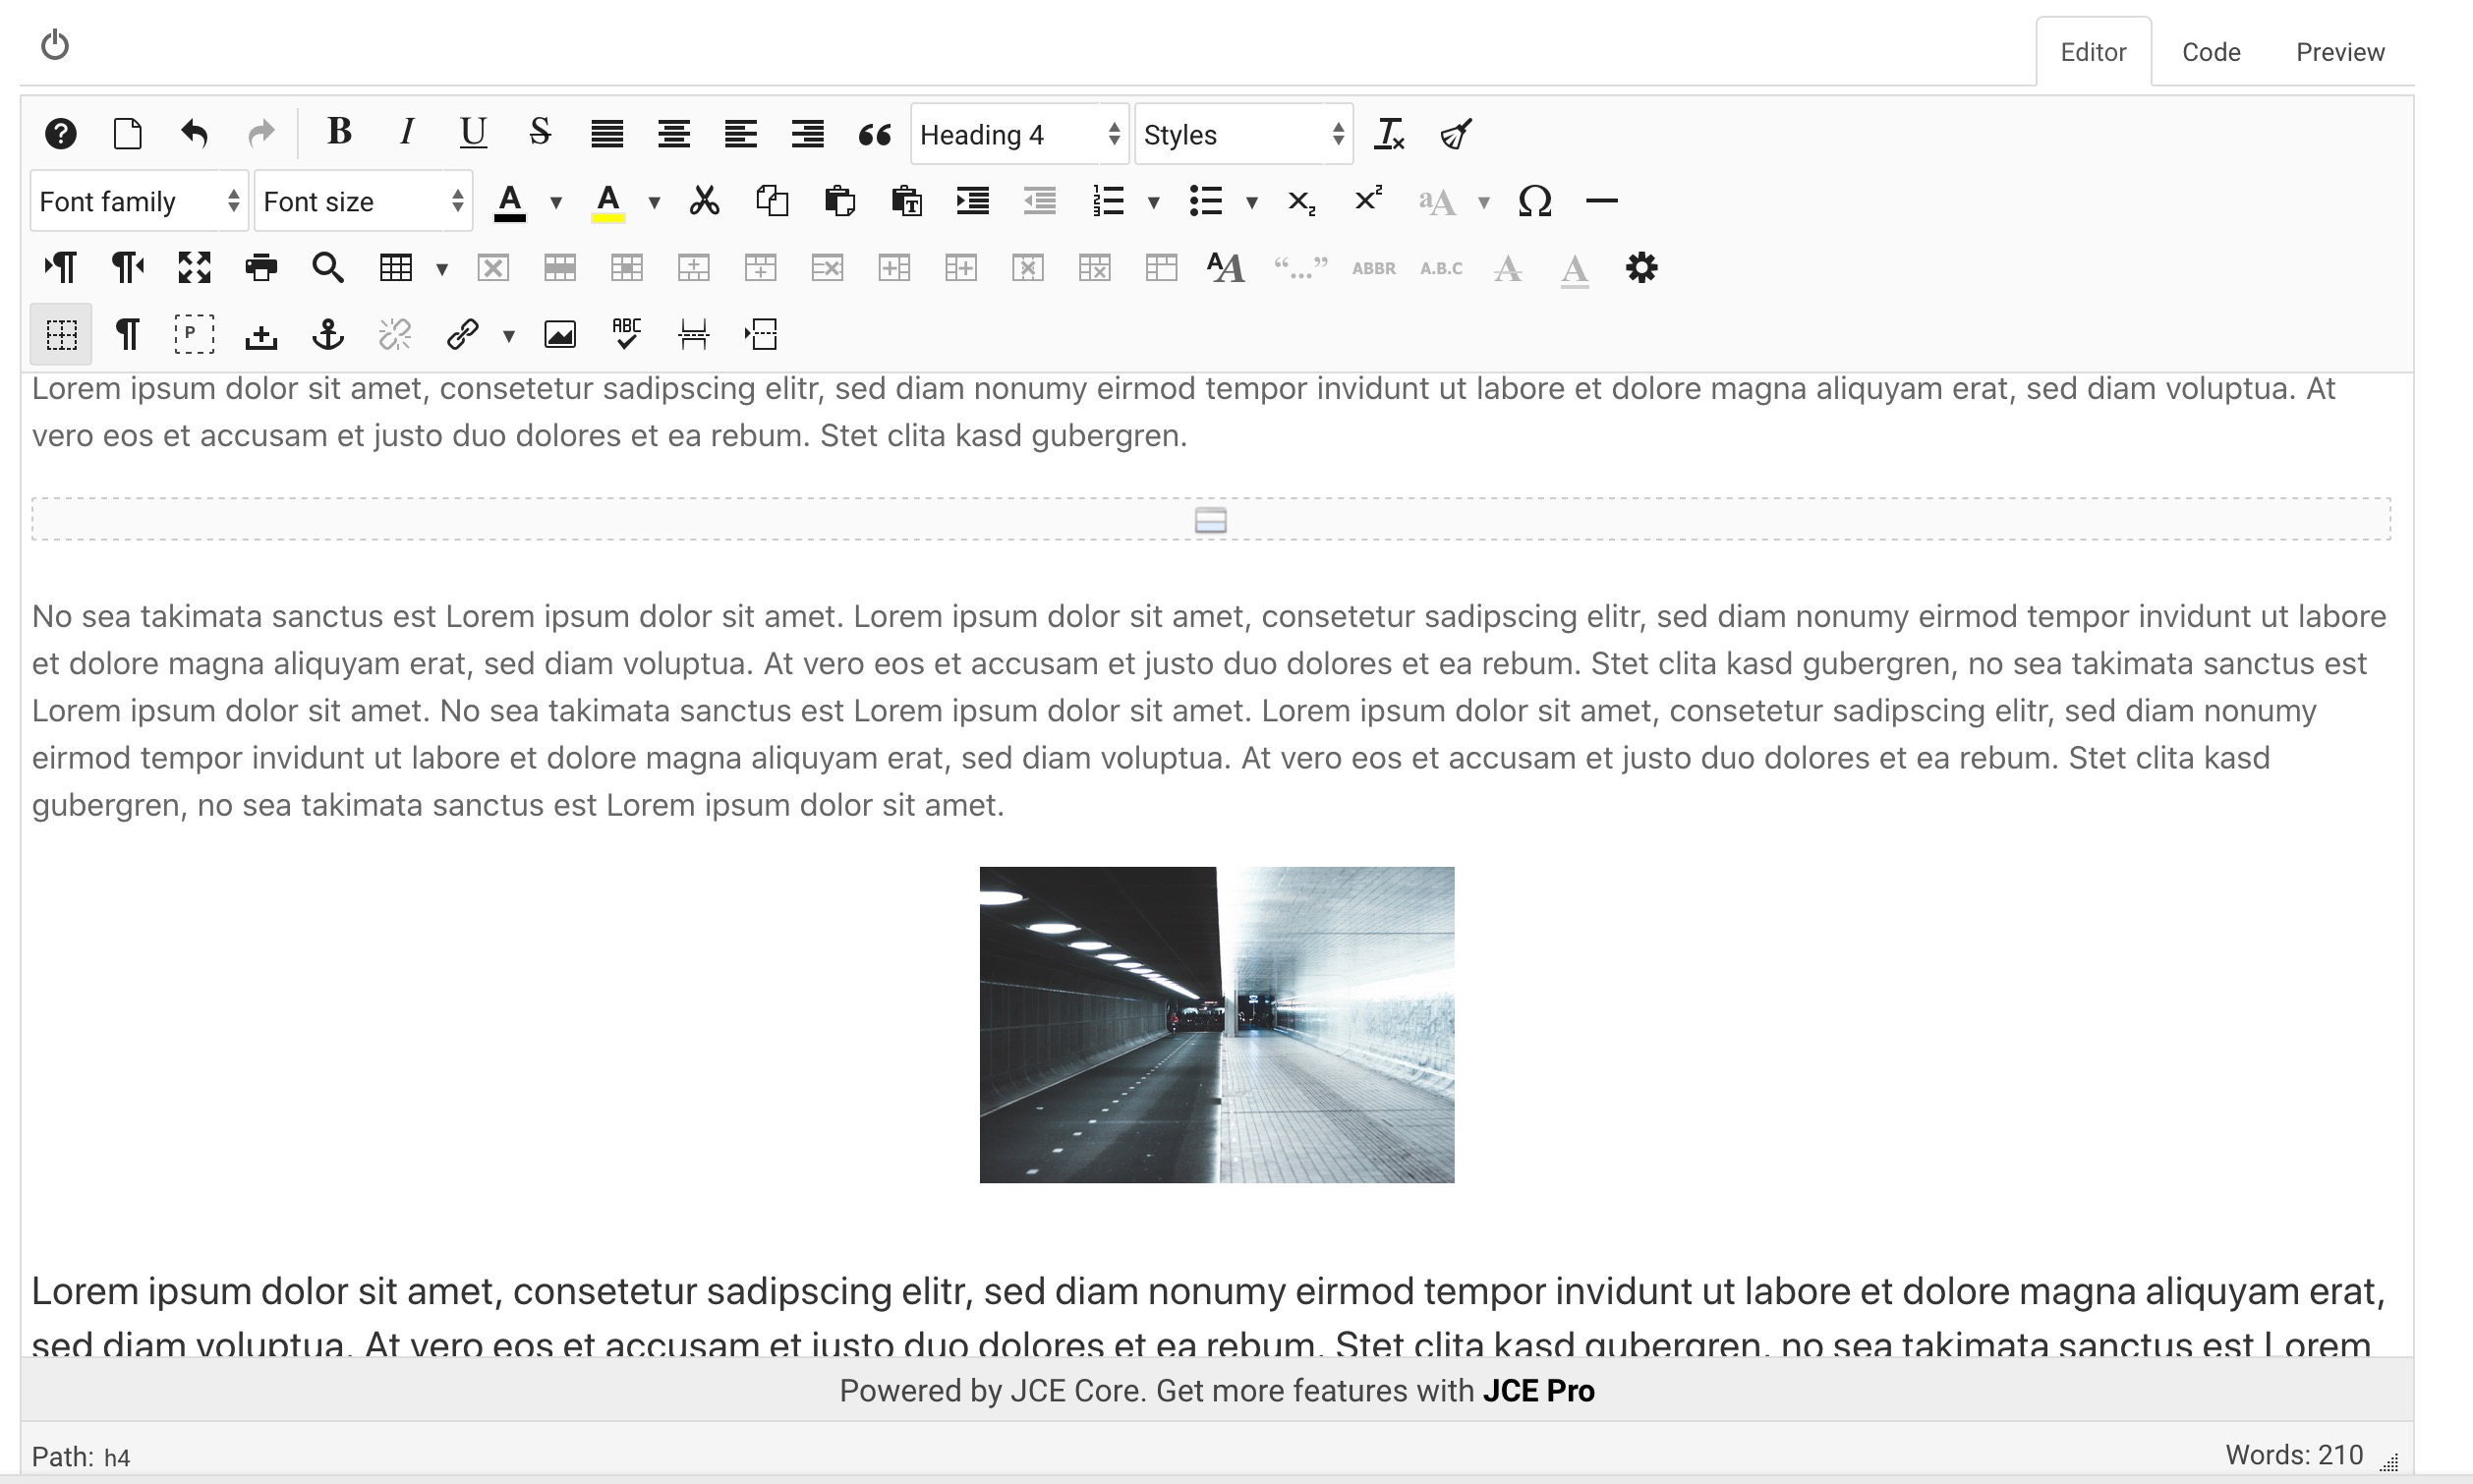
Now lets add some Content to the Article. In our example, I have inserted a few lines of lorem-ipsum followed by a read more link. After the read more link I added some more text and an image. (This image is not used for the article display in Exposer, we'll get to that in a moment).
(If you need more information on how to create articles or categories you can check out these articles from the official Joomla! Docs: Article | Categories )
(If you need more information on how to create articles or categories you can check out these articles from the official Joomla! Docs: Article | Categories )
Don't forget to set the articles to the status published and leave the access to Public!
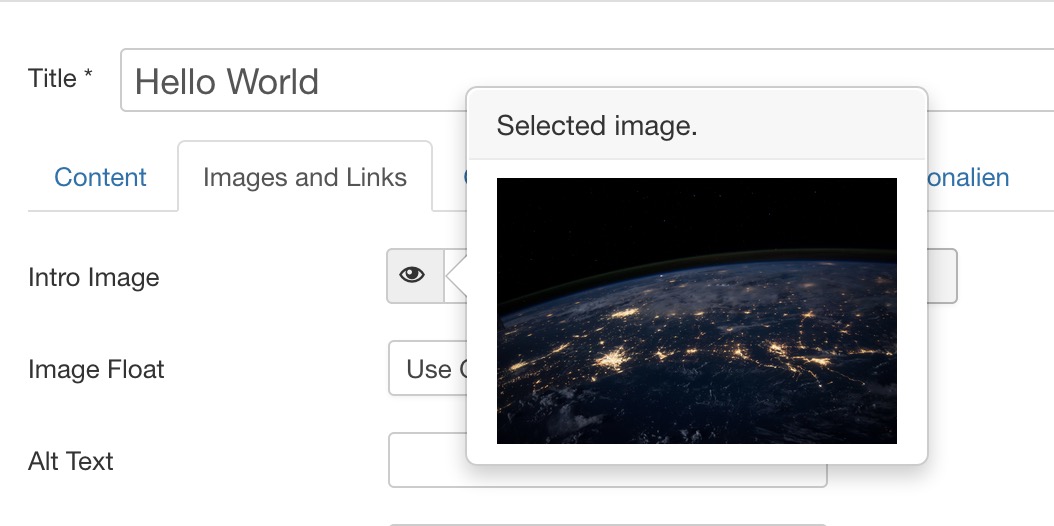
Now the actual music comes into play, switch in the article editor to the tab Images & Links. On this page you can configure an Intro Image, Full Article Image and the URL A-C. In our example we first define an Intro Image for our Hello World article:
So, we created a new article in the category News, gave it an intro text & full text and defined an intro image. Now let's save this article and copy it two more times, we can simply do this via Joomla! using the "Save as copy" or "Copy" dialog in the article overview. Don't forget to edit the copied articles a little bit, other title & intro images provide a little variety. Important: Note that the new articles are also published and assigned to an access-level that you can see in the frontend (the easiest would be Public).
In the end the article overview should look like this:
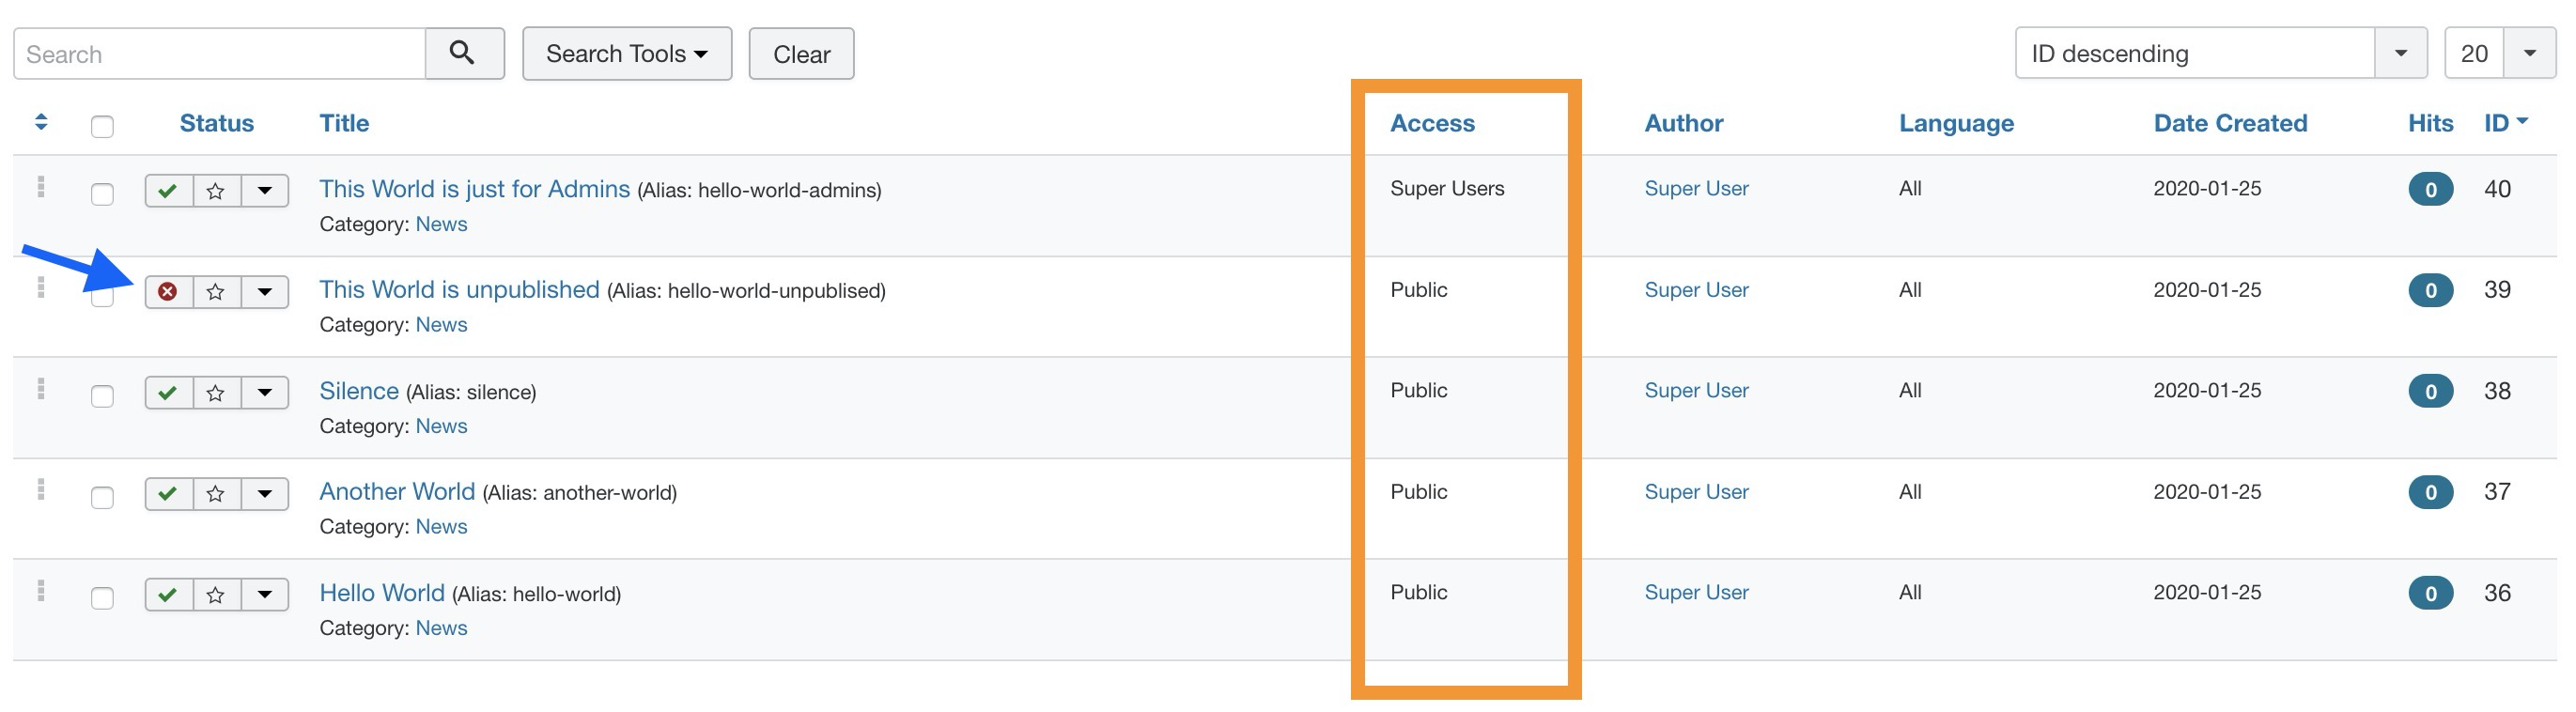
Note in the screenshot above, I created two more articles, one is not published and the other "..Just for Admins" is only available for Super Users. Later we will see what that means.
Module configuration
Module Tab
After installing the Exposer Module you should already find a module named Exposer under Extensions --> Modules within the Site section. If this is not the case or you want to add a new module instance, you can create a new module instance by clicking the New Button and select Exposer.
We will now briefly go through the most necessary options for creating a grid view in the Exposer. First we give the new module a title, in our example I name the module Exposer News.
As basic configuration of each Joomla module we have to set the option in the tab Menu Assignement to "On All Pages" or adjust the assignment option so that the module is displayed on a page (which we can find later).
Don't forget to select a module position of your template in the column on the right & set the status to published!
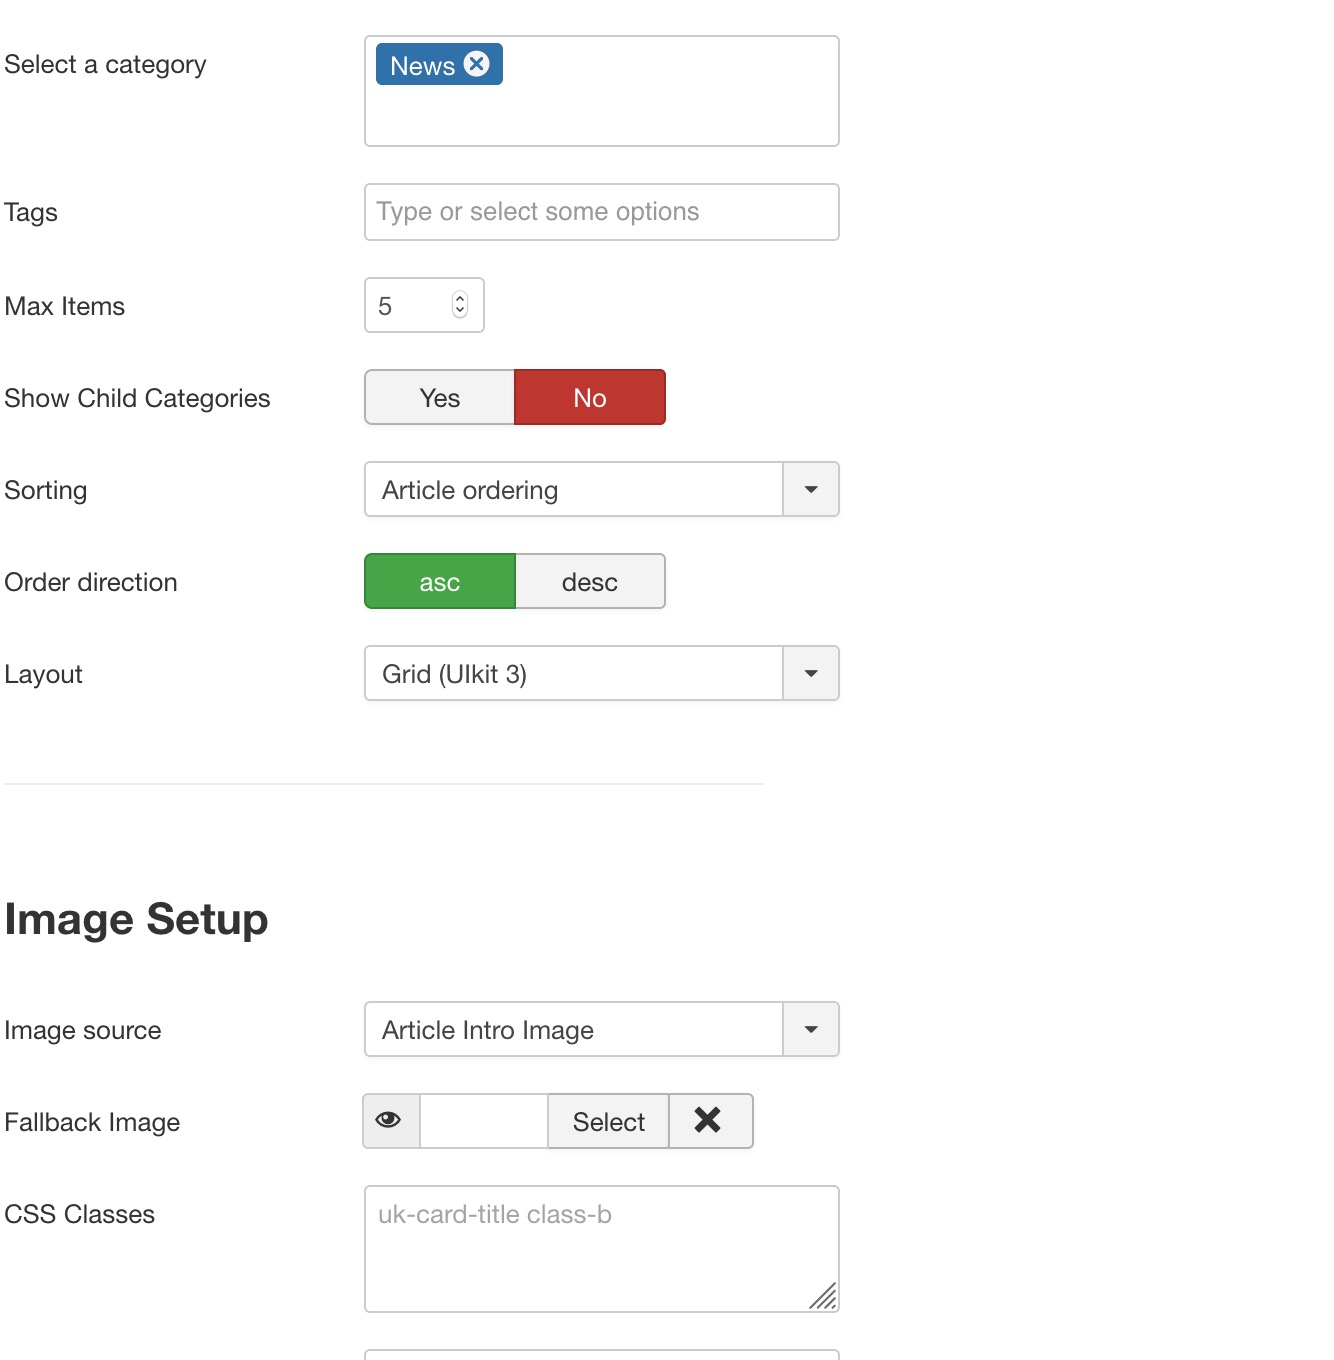
As the first option that we customize, we choose in the module tab directly our previously created News category.
Now we select the Grid (UIkit 3) layout from the drop down list. The Layout option defines which template should be loaded.
In the Image Setup section we select Article Intro Image as source.
Grid Tab
In the Grid Tab we deactivate the eyecatcher option (this will be explained in another article).
And that's it! If you now look at the module in the frontend of your site you will see what we have created together!
But what about the other two articles? Articles for which the respective visitor has no access are not loaded / displayed. Furthermore, articles that do not have the status Published are generally not loaded.